The following article is taken from Bryan Kennedy’s blog. Original link: https://plusbryan.com/mysql-replication-without-downtime
I found the information there so valuable that I decided to save it here, as I find myself looking for it frequently.
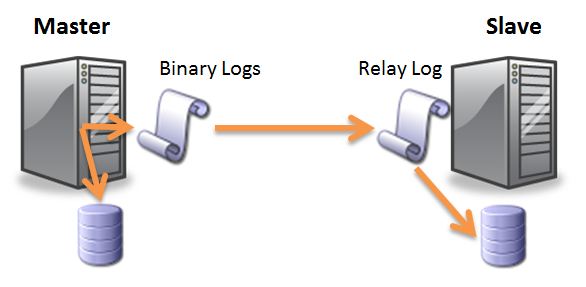
Replication is something that provides both speed and durability. Usually it is used in environments where the loads on the database are heavy or we want to avoid downtime. However, most methods for replication online include stopping instances, which is unacceptable in a busy production environment.
In order to do it with minimal downtime (just a few restarts):
First, you’ll need to configure the master’s /etc/mysql/my.cnf (or for newer versions of MySQL /etc/mysql/*.conf.d/mysqld.conf) by adding these lines in the [mysqld] section:
server-id=1
binlog-format = mixed
log-bin=mysql-bin
datadir=/var/lib/mysql
innodb_flush_log_at_trx_commit=1
sync_binlog=1
Restart the master mysql server and create a replication user that your slave server will use to connect to the master.
CREATE USER replicant@;
GRANT REPLICATION SLAVE ON . TO replicant@ IDENTIFIED BY '';
Note: Mysql allows for passwords up to 32 characters for replication users.
Next, create the backup file with the binlog position. It will affect the performance of your database server, but won’t lock your tables:
mysqldump --skip-lock-tables --single-transaction --flush-logs --hex-blob --master-data=2 -A > ~/dump.sqlNow, examine the head of the file and jot down the values for MASTER_LOG_FILE and MASTER_LOG_POS. You will need them later:
head dump.sql -n80 | grep "MASTER_LOG_POS"This file might be huge, so you can gzip it before moving it to the slave (optional):
gzip ~/dump.sqlNow we need to transfer the dump file to our slave server (if you didn’t gzip first, remove the .gz bit):
scp ~/dump.sql.gz mysql-user@:~/While that’s running, you should log into your slave server, and edit your /etc/mysql/my.cnf (or another position, according to your MySQL version) file to add the following lines:
server-id = 101
binlog-format = mixed
log_bin = mysql-bin
relay-log = mysql-relay-bin
log-slave-updates = 1
read-only = 1
Restart the mysql slave, and then import your dump file (gunzip if you compressed it earlier):
gunzip ~/dump.sql.gz
mysql -u root -p < ~/dump.sql
CHANGE MASTER TO MASTER_HOST='',MASTER_USER='replicant',MASTER_PASSWORD='', MASTER_LOG_FILE='', MASTER_LOG_POS=;
START SLAVE;To check the progress of your slave:
SHOW SLAVE STATUS \GIf all is well, Last_Error will be blank, and Slave_IO_State will report “Waiting for master to send event”. Look for Seconds_Behind_Master which indicates how far behind it is. It took me a few hours to accomplish all of the above, but the slave caught up in a matter of minutes. YMMV.
And now you have a newly minted MySQL slave server without experiencing any downtime!
A parting tip: Sometimes errors occur in replication. For example, if you accidentally change a row of data on your slave. If this happens, fix the data, then run:
STOP SLAVE;
SET GLOBAL SQL_SLAVE_SKIP_COUNTER = 1;
START SLAVE;